
How-to guides
Features
Step-by-step walkthroughs with real Switchboard screenshots — from accounts to MCP.
Workspace
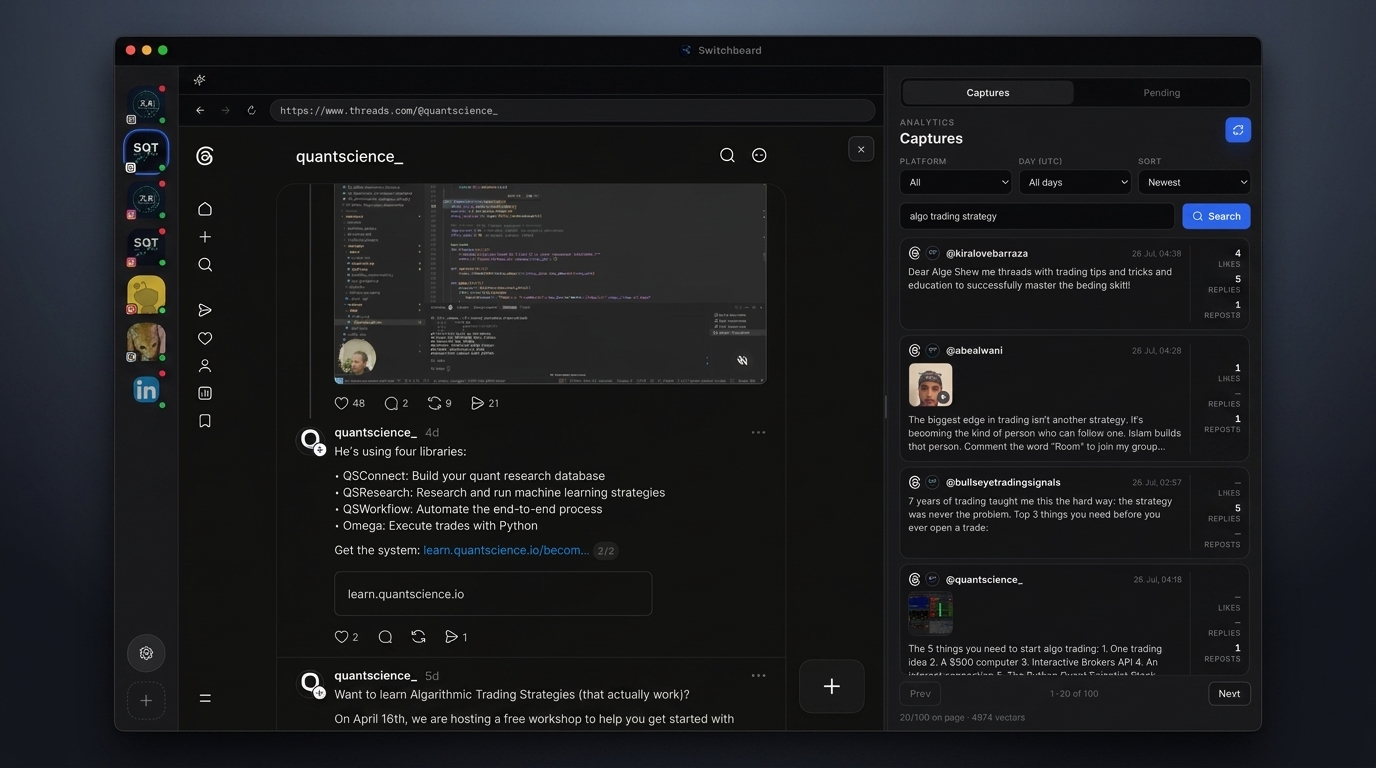
Multi-account workspace
Keep every social login in its own session and switch from one sidebar.
Steps
- 01
Add a social page
Click + in the sidebar, pick a network, and sign in inside the embedded browser. Each page uses an isolated persist partition.
- 02
Switch accounts
Use the left avatar stack to jump between Instagram, Threads, X, and more without mixing cookies.
- 03
Browse live
The center pane is a real webview — feeds, notifications, and profiles work like the native site.
Captures
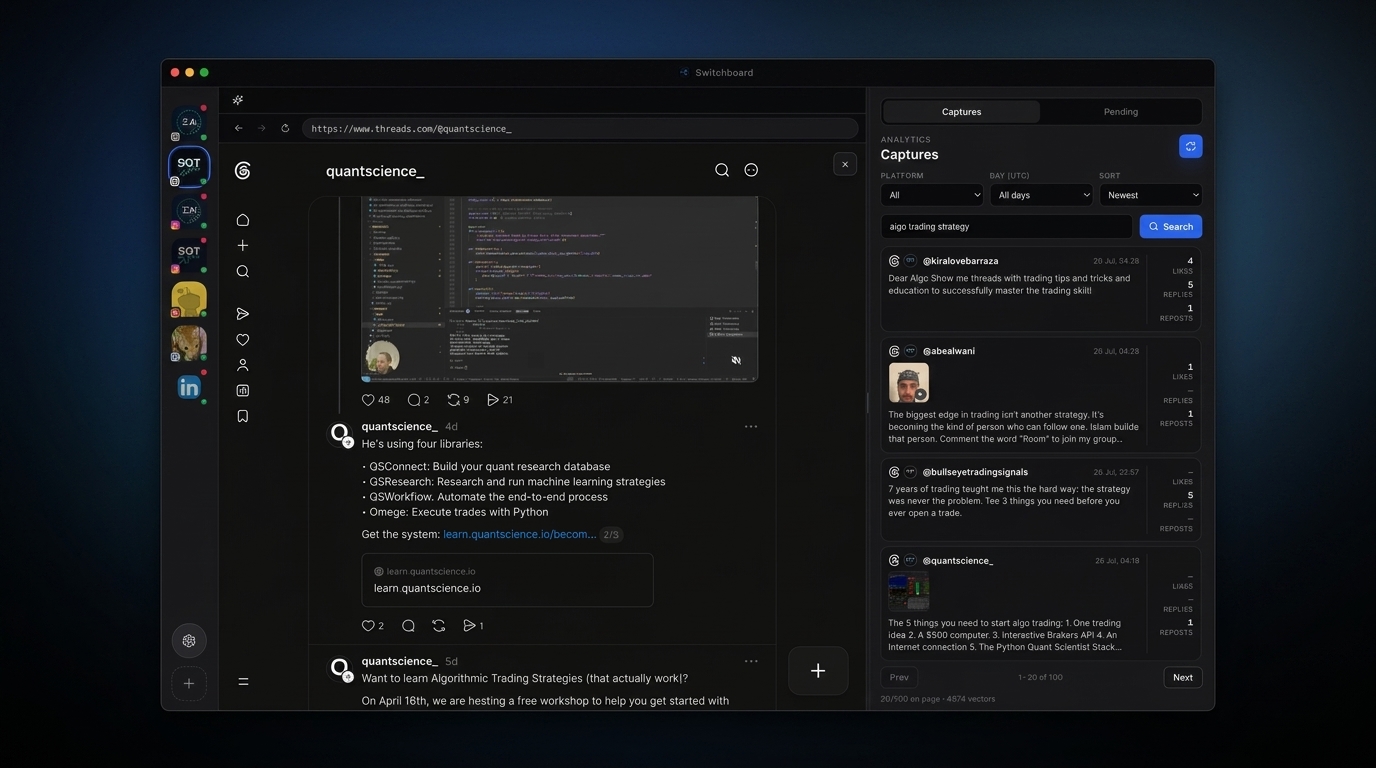
Your searchable post archive
On Instagram and other feeds, posts scroll away or disappear — and you often can’t find them again. Switchboard keeps the posts you’ve captured as a local archive you can search anytime.
Steps
- 01
Open Captures
Select the Captures tab in the right panel while a supported feed is open.
- 02
Keep what you scroll past
Logged-in sessions can auto-capture as you browse; you can also trigger captures via MCP tools — so old posts aren’t lost when the platform buries them.
- 03
Search your history
Use embedding search to pull up past posts and replies across platforms and days — even when the original feed no longer surfaces them.
Hot draft
Study hot posts & draft
Learn from historical high-engagement posts and what’s hot recently, then draft for attention.
Steps
- 01
Collect signal
Keep capturing feeds so Switchboard has recent and historical examples with engagement.
- 02
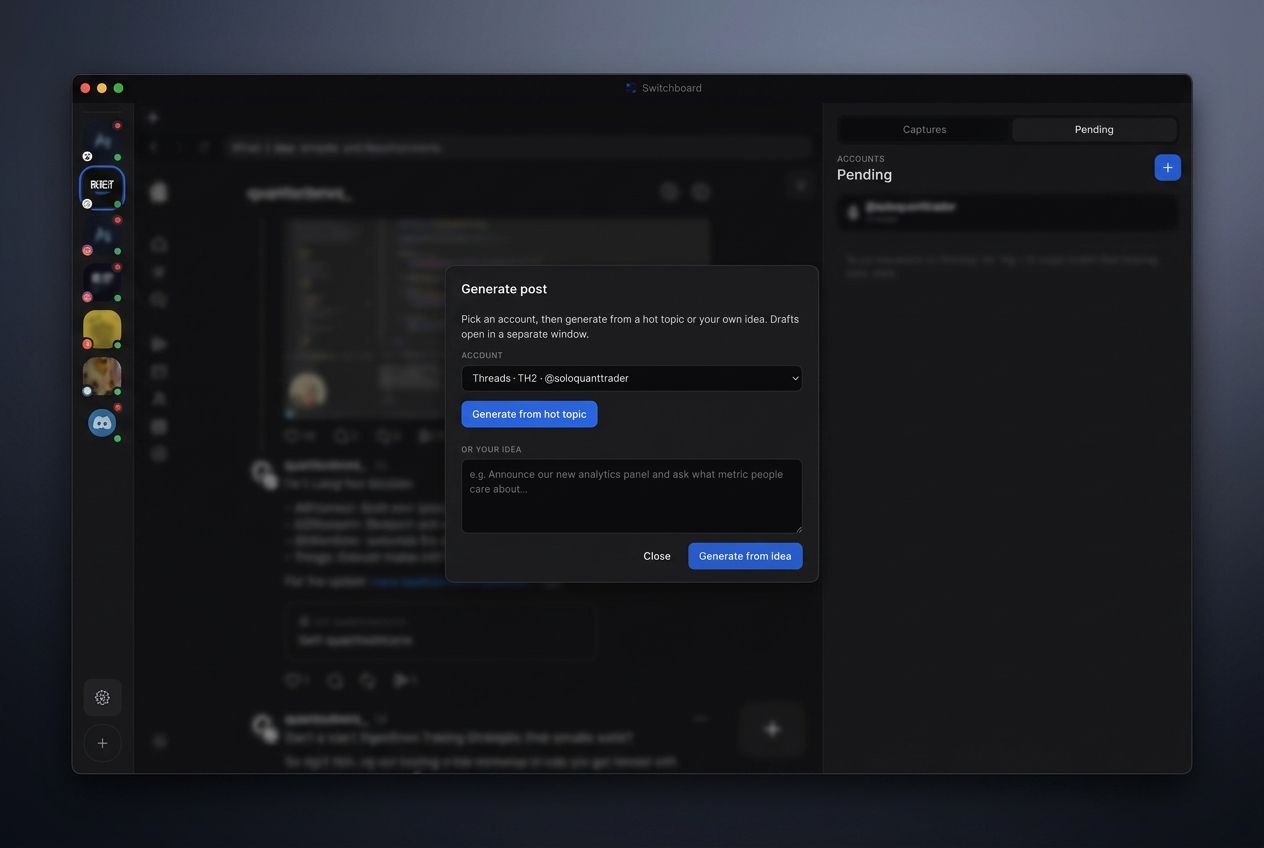
Generate a post
Open Generate post — the flow uses your writing skill plus similar high-signal feeds.
- 03
Send to Pending
Review the draft and drop it into the Pending queue before you release.
AI engagement posts
Use AI to generate high-engagement posts
Combine free cloud tokens, Main Brain, and hot-topic generation so drafts aim for likes, replies, and comments — then you approve before anything goes live.
Steps
- 01
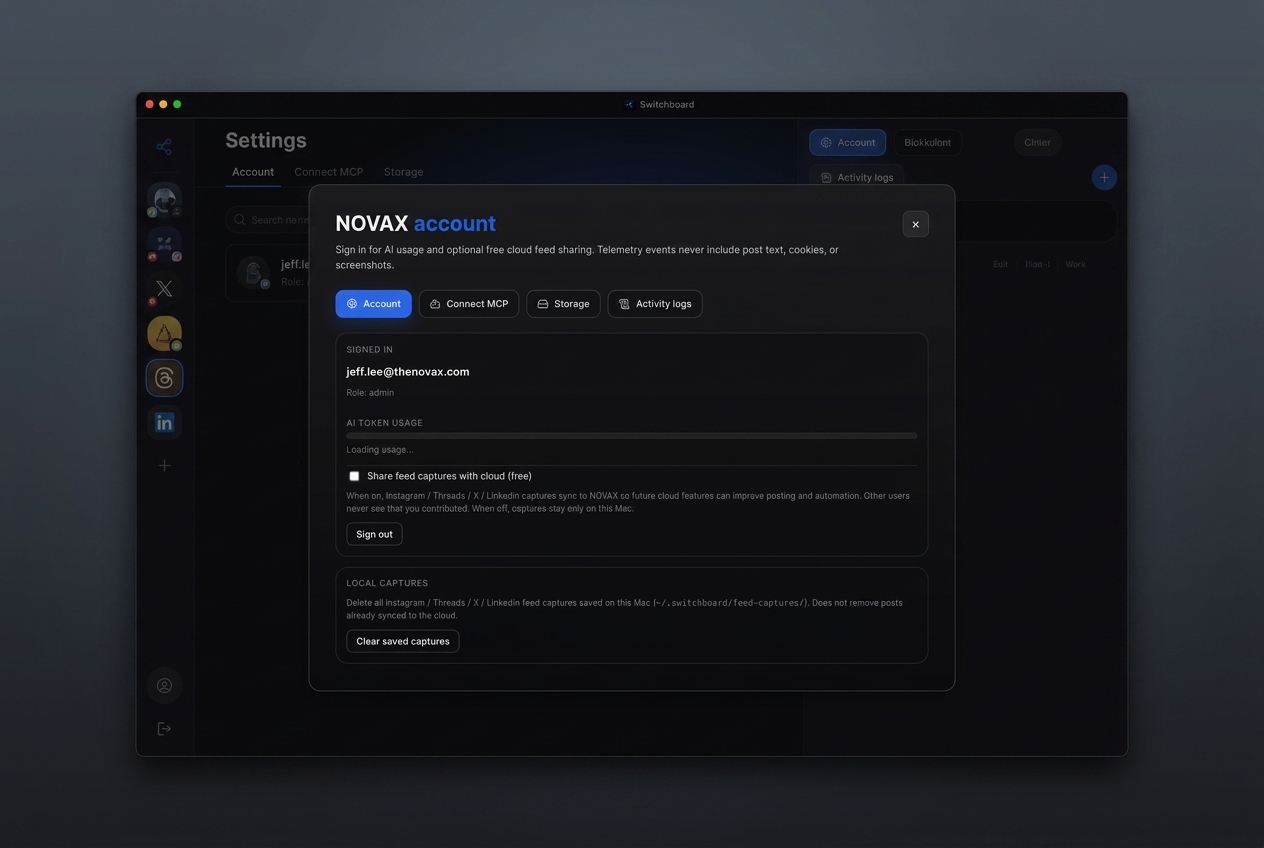
Unlock free AI tokens
Sign in under Settings → Account. Connected accounts get complimentary cloud AI quota for drafting with Main Brain.
- 02
Feed the model with engagement
Keep Captures filled with posts that already have likes, replies, and comments — local history plus optional crowd sync makes signals richer.
- 03
Generate from a hot topic
Open Generate post, pick the account, and run Generate from hot topic (or your own idea). AI drafts for attention using high-signal patterns.
- 04
Review, then queue or schedule
Edit the draft in the result dialog, send it to Pending, and schedule or release when you’re ready — draft-by-default keeps you in control.
Pending
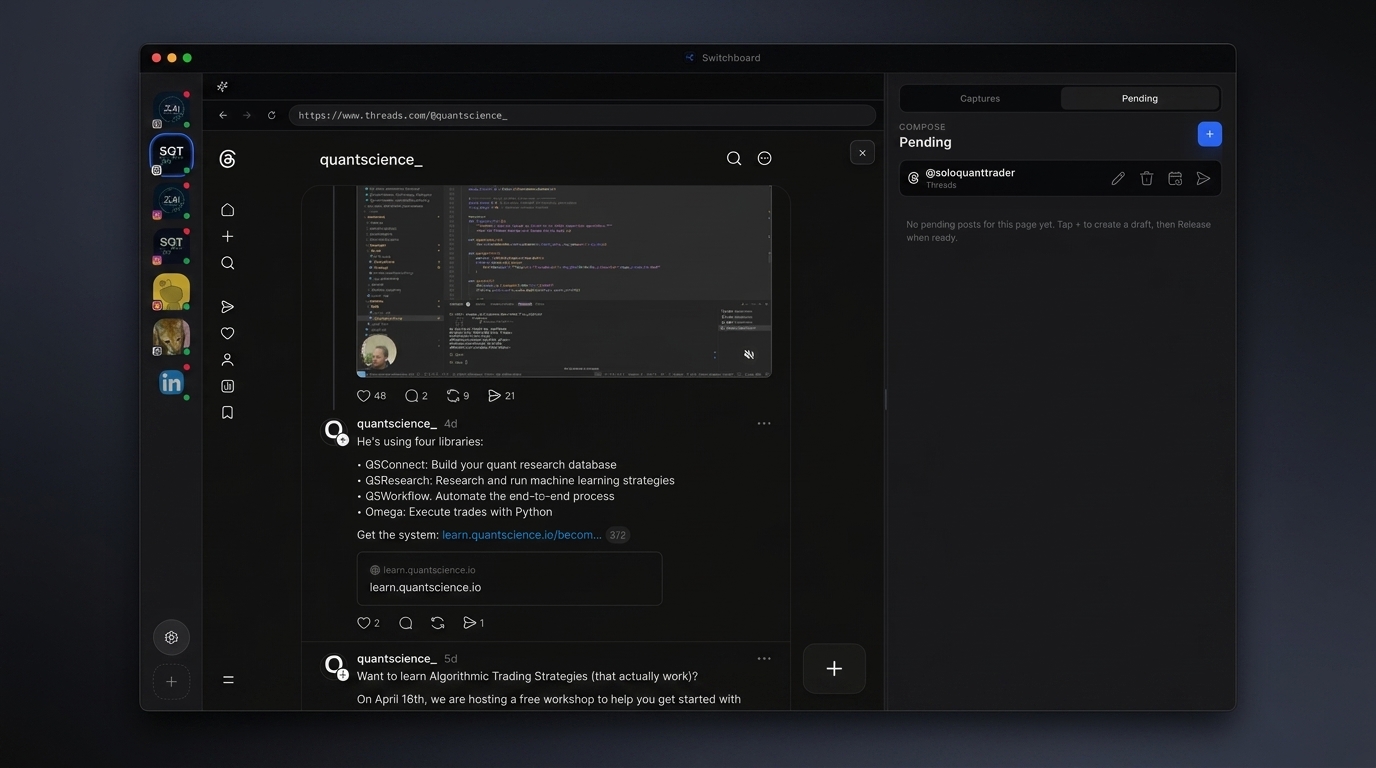
Compose queue
Park drafts per account, edit inline, then schedule or release.
Steps
- 01
Open Pending
Switch to the Pending tab to see drafts for the active account.
- 02
Edit or delete
Use the icon actions on a card to refine copy or remove a draft.
- 03
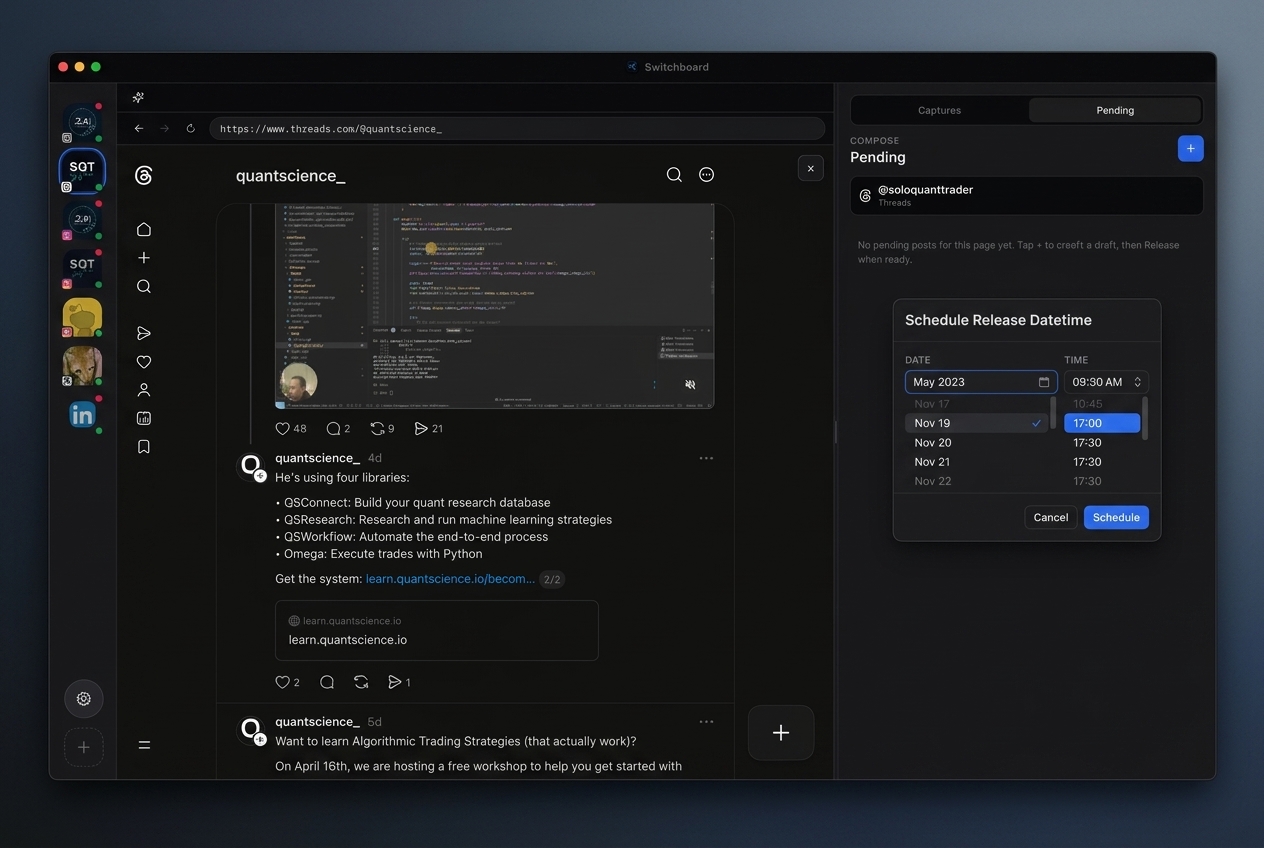
Schedule or release
Pick Schedule release for a datetime, or Release now to publish from the live session.
Schedule
Schedule a release
Set when a Pending draft should go out while Switchboard is open.
Steps
- 01
Choose a draft
In Pending, click the calendar (Schedule release) icon on the post you want.
- 02
Pick date & time
Confirm the datetime dialog — defaults prefer spacing after your latest scheduled post.
- 03
Let it release
Keep the app open; due drafts are released automatically on a short interval.
Connect MCP
Connect AI agents
Point Cursor or other MCP clients at Switchboard for human-like automation.
Steps
- 01
Open Connect MCP
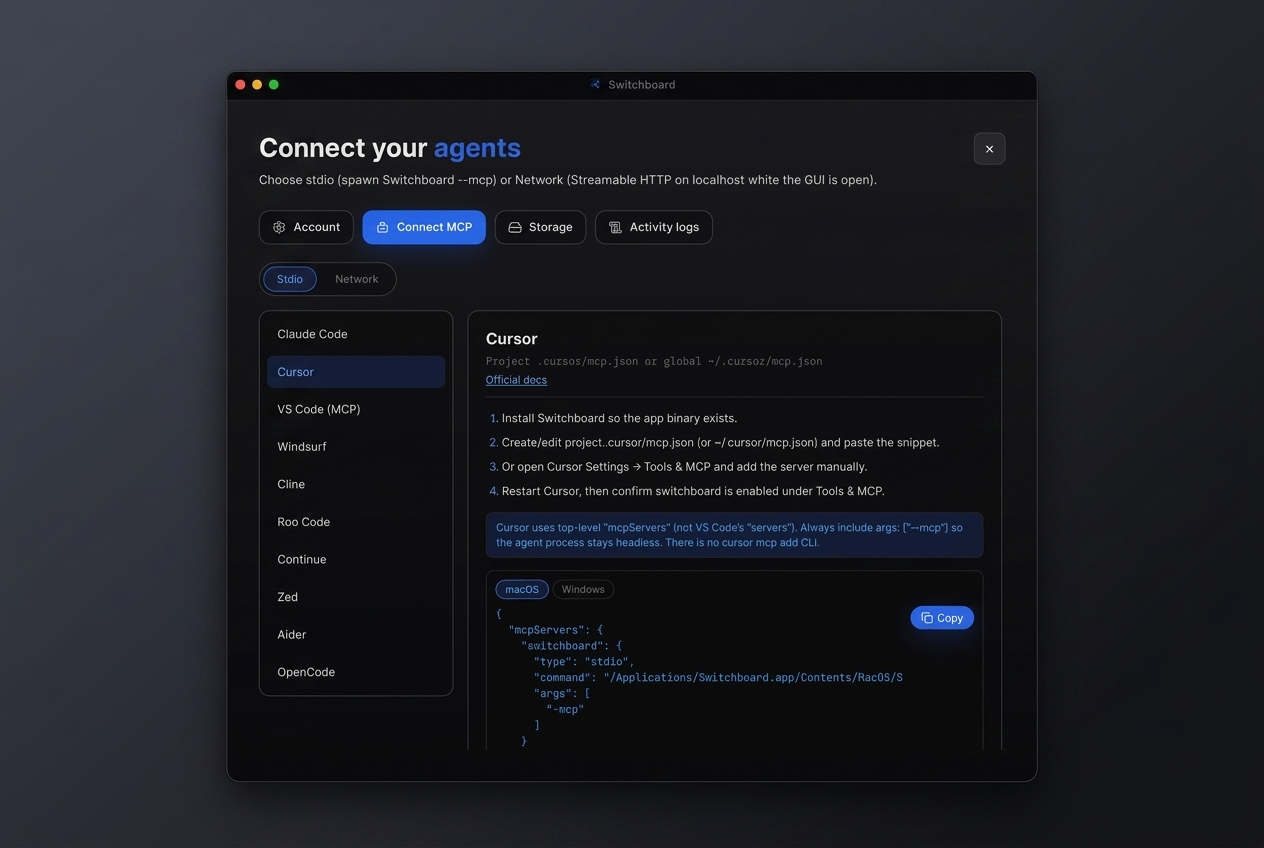
Go to Settings → Connect MCP and choose Stdio (or Network while the GUI is open).
- 02
Copy the snippet
Select Cursor (or another client) and copy the mcp.json config with the --mcp flag.
- 03
Restart the agent
Save the config, restart Cursor, and keep the Switchboard GUI running for Instagram/Threads tools.
Account
NOVAX Cloud: crowd data, free tokens, Main Brain
Sign in to contribute feed data with engagement and comments, unlock a free AI token quota, and use Main Brain to draft high-performance posts.
Steps
- 01
Open Settings → Account
Use the gear icon, then the Account tab to register or sign in to NOVAX Cloud.
- 02
Share feeds into the crowd pool
Opt in to sync captures (with engagement and comment context) to thenovax.com — or keep everything local. More diverse contributors make the cloud smarter.
- 03
Spend free tokens with Main Brain
Connected accounts get complimentary cloud AI quota. Ask Main Brain to draft posts tuned for the best engagement using crowd + your signals.